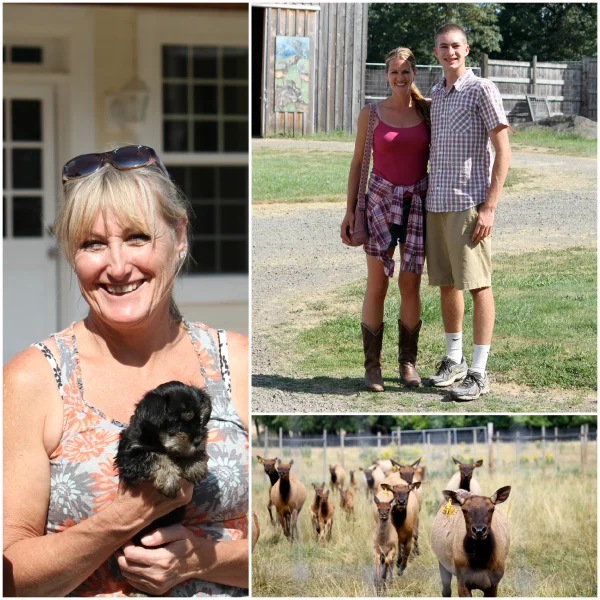
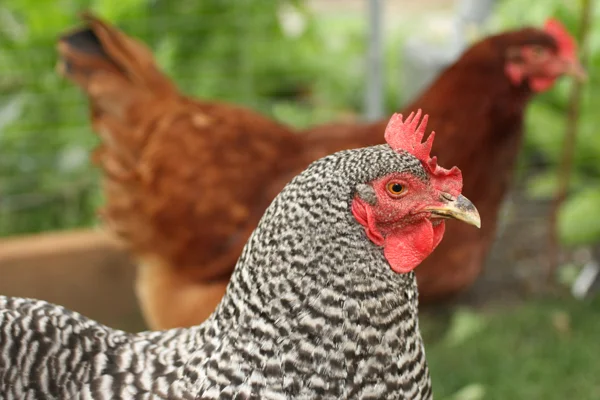
for my exam: Chicken Chardonnay

December 14th, 2008

mushroomsChicken, 165, chicken, 165… it is at 165 Fahrenheit when your chicken is cooked/safe: no longer pink, but still moist and tender. I love when I finally commit key facts to my brain; it is empowering in the kitchen to know benchmark temperatures for all kinds of meat, seafood and poultry.

In our cooking fundamentals class, we learned to fabricate a chicken. Not news to some of you, but to many like myself, perhaps chopping up a bird is an intimidating notion. I have now fabricated 3 chickens (1 at school and 2 at home). It was a large looming thing in my mind: to learn how to slice up a chicken. No doubt I could have gone online and watched a video snippet on any number of food sites… but I didn’t. And who would say if I had done it correctly? I would have a pile of questions, wanting to know about that bone or this, where exactly to cut and where not to. I wouldn’t just want to cut up a chicken: I would want to do it well, confidently, and ‘right.’

Because I wouldn’t want to waste anything. I like the idea of using the whole bird—of making the most of each part. Something about that seems respectful, not necessarily [but then again...] to the chicken, but to our ancestors who used every morsel, and especially to those who are less fortunate. There are many in this world who would be grateful for a bird in their kitchen—food to offer their family. Who I am to waste? So I learned: how to use the bones to make stock, the legs and thighs to make chicken concasse, and the breasts to make our new family favorite—and the entree for my practical exam—Chicken Chardonnay.

We made Chicken Chardonnay for the first time in class two weeks ago, and I have made it at home four times since (without complaint!). Not just a test at school, this recipe scored me points at home: my non-mushroom eating son began eating—and liking—mushrooms.

Chicken Chardonnay
serves 4.

Clarified Butter (doesn’t burn as quickly as regular butter)
1/4 cup shallots, minced (2 oz)
12 oz mushrooms, sliced (eh, anything from 1 1/2 - 2 cups works)
1/2 cup white wine (4 oz)
3/4 cup chicken stock (6 oz)
3/4 cup heavy cream (6 oz)
parsley, finely chopped (as needed)
SP (salt & pepper) TT (to taste)
flour (as needed)

Notable Equipment: meat thermometer, tongs

Heat saute pan to just above medium, add clarified butter; when it shimmers, add chicken with tongs. To prepare chicken: pat dry, season with salt and pepper, dredge with flour (make sure to flour the entire breast; it seals in the moisture once it is browned); shake off excess flour (so it doesn’t cook unevenly). Saute chicken breast presentation side down until golden brown. Turn and saute second side. Remove breasts, place in baking pan and finish in 350 degree oven (thermometer should read 165F).

Meanwhile, in the same saute pan (adjust the fat, meaning add or remove butter as needed) add shallots, mushrooms and saute 3-5 minutes. Add (deglaze pan) wine and reduce by half; add stock and reduce by half; add heavy cream and reduce by half (to thicken). Season with salt & pepper to taste; garnish with parsley. Choose your consistency; if it gets to thick, continue to add broth and/or cream. Do not add wine at end as the alcohol flavor won’t have time to burn off/integrate.

*green text represents input from chef instructors or text from culinary school. You know I love condensed recipes, food that one can make quickly and without excess hassle. SO feel free to skip the green text as it is not essential to achieving a successful recipe OR read it for some added culinary interest, if desired.

  • del.icio.us
  • Digg
  • StumbleUpon

Carrot Risotto

December 10th, 2008

And a starch. Make any starch of your choice.

And so it has begun. Where they start to lengthen the leash, push you out of the nest and watch you stumble and stutter and hopefully fly. No more recipe excuses. Recipes might be wrong… now you must start to exercise methodology, use your brain and [gulp] put your new knowledge to use.

Go ahead and figure out timing: present all items to the CHEF on a plate, perfectly cooked, held, warmed, prepared and finished to serve in a specific window of time. Choose a starch, select a vegetable and keep it warm, colorful and well, presentable.

It is time to dig a little deeper into my chef’s soul. Grab instinct, snag from the factoids floating around in my brain, think through timing of each item, resist frenzy and sync up with 3 other team members.

We are in class, and have just been given a specific entree. But we are asked to present a whole plate (I mean, we did spend a whole day on starches and a whole day on preparing and cooking vegetables, so we should be ready, right?), including a starch and vegetable of your choice. Oh, and watch the color.

You don’t want white potatoes for your starch and parsnips as your vegetable—especially if you are serving chicken. White, white, white. Instead, go with bright green broccoli or snap peas or opt for glazed carrots; use wild rice instead of potatoes or pilaf. But I must say: the starch seems to hold down the record for boring color. I mean think vegetable and your mind starts teaming with juicy red tomatoes and yellow summer squash, eggplant, carrots, peppers and any number of greens. But starch? It takes a bit more work to pull colorful remembrances out of rice, risotto, pasta or potato. Not impossible, mind you, just that the go-to starches lean toward colorless.

But if you were to dress up risotto, perhaps orange? This recipe injects jewel-like orange gems across its white palate. And there you have it: a colorful starch. All good timing, as I needed to practice risotto-making. I like to re-make items from class, to double check if I have questions or ideas or things come together for me even more than the first time (Hollandaise sauce took me quite a few rounds, before I started to pick up on ‘best practices,’ but that is a story for another day).

This recipe, though lightly adjusted, is originally from Sunset’s April 2008 magazine:

Carrot Risotto
2 T vegetable oil
3 T unsalted butter
4 medium carrots, small dice (about 3 cups)
pinch salt
larger pinch sugar
5 cups low salt chicken broth
1/3 cup minced onion
1 1/2 cups arborio rice
1/2 cup dry white wine
1/4 cup heavy cream
1/4 cup Parmesan (plus more for garnish)
2 T finely chopped parsley
1 tsp roughly chopped fresh thyme
pinch white pepper

Heat 1 T oil and 1 T butter over medium heat in medium/heavy bottom pot. Add carrots and stir to coat; add 1/2 cup water, pinch salt and sugar, cover and cook 5 minutes. Uncover and cook until liquid is gone and carrots begin to brown. Reserve half carrots and puree the other half in a blender, with 3/4 cup hot water. Bring stock to simmer in separate pan. Heat 1 T oil and 2 T butter in same carrot pot; add onion and cook 3 minutes. Add rice, stir to coat and cook 1 minute. Add wine until absorbed. Add carrot puree, cooking for a few minutes; add 1/2 cup broth. Stir, when liquid is absorbed add another 1/2 cup stock. Continue adding 1/2 cup at a time until each is absorbed, for about 20 minutes. You should have about a cup of remaining stock. Fold in reserved carrots, 1/4 cup Parmesan, 1 T parsley, and thyme. Add a little broth at a time until desired consistency; add S and WP (white pepper) TT (to taste). Garnish with Parmesan and parsley, if desired.

Note: heats up brilliantly for tomorrow’s lunch. Reheat gently on stove, adding yet a bit more stock to loosen up the risotto. We had it for lunch the next day with grilled sausage and peppers.

  • del.icio.us
  • Digg
  • StumbleUpon

…to hold my clarified butter, of course. And my rice pilaf and mushroom soup and, and…

It was bound to happen. Sooner or later, the habits I am forming and the methodologies I am learning in culinary school are bound to trickle into my home kitchen. Translated, that means some kitchen gadgets—or glaring utility items—are missing. Which is why for Christmas, I want a Bain Marie. AND a stack of stainless steel bowls AND some metal canisters, AND some 1oz and 2oz ladles. And one can never have too many wooden spoons or tongs or whisks…

But really, all I want for Christmas is a Bain Marie, because it holds my clarified butter and one must have clarified butter while cooking. So I explained to my kiddos: clarified butter is butter that you gently melt butter (not by boiling) to separate the 3 parts of butter (water, butter fat and milk solids). The water evaporates, the milk solids settle on the bottom and all you are left with is butter fat (approximately 80% of the butter you started with—in case you are curious). Skim impurities off the top, leave the solids in the bottom and save all the butter fat.

Clarified butter is a lot less susceptible to spoilage and has a higher smoking point; it is considered more stable than whole butter.

You can store the butter fat/clarified butter in the fridge, covered (for up to a month), but when cooking you want it by your side, melted. Which is why I want a Bain Marie: a hotel pan, if you will, that goes on my stove, half filled with simmering water to hold items warm. Like butter. Or soups that are already made, or a sauce you made in advance but need to keep warm until you serve it.

Why clarify butter? Because it has a much higher burning point. So you can saute foods at higher temperatures, without the butter burning. In many cases, whole butter is great, but sometimes when you are sauteing or pan frying or something of that nature, you want a more stable butter. Going forward, if I use clarified butter, I will note it as such, and link back to this page.

A little secret: I don’t really need a Bain Marie for my clarified butter and neither do you. I put my pyrex (heat proof) measuring cup into a small saucepan with barely simmering water. The butter melts beautifully and holds there just as easily… But please don’t tell Santa.

  • del.icio.us
  • Digg
  • StumbleUpon

I adore how each country has its own condiment for fries. In the states we are ketchup central (though I am a bit jealous that our neighbors to the north, aka Canada, have ketchup without corn syrup. Did you know that? Due to laws that protect consumers their Coca-cola, Heinz ketchup, etc. are made without corn syrup. But those same items in the states come with the nasty stuff).

Note to my relatives living in Canada: for Christmas I would love a case of Heinz ketchup. Tastes the same, bottled under the same name, but sans corn syrup. That would take care of my fries for at least a year! Oops—I digress. Back to the fries. In London, they eat MAYONNAISE with their fries; I am aware that other countries favor malt vinegar and/or gravy. Have you heard of others?

Actually, it was at Byron (remember, where we ate Proper Hamburgers) where the little ramekin of mayonnaise accompanied some lovingly prepared fries. And we stared at it for a moment. And decided “when in Rome,” or in this case “when in London, eat as they do in London.” So we tucked in. And it was… really good. To be fair, it was not jarred mayonnaise: it was fresh.

Which pulls me—happily—full circle. From eating fries and talking of London to sharing a recipe from culinary school at home, in Seattle. We made mayonnaise last week! What fun timing to have just whisked my arm to death making mayonnaise in class, to jet-setting across the globe to a humble little table in London, only to be served handmade mayonnaise?! I enjoyed it, and appreciated the effort of whomever back in the kitchen took time to lovingly prepare mayonnaise to partner with my fries. Thanks.

So if you want an alternative experience to corn syrupy ketchup and don’t have relatives in Canada to deliver you a case (truth be told, you can now buy organic ketchup in the states, sans corn syrup), you are only about a thousand whisks away from made-from-scratch mayonnaise to go with those fries.

Mayonnaise
1 egg yolk (if I had the choice: fresh, organic, cage-free…)
7 oz (just under a cup) vegetable oil
1 tsp prepared OR dried mustard
1-2 T fresh lemon juice
1-2 T water
Salt & White Pepper, to taste
Optional, choose one: dash of Tabasco, dash of Worcestershire, dash cider vinegar

Use a whisk with a big head and fine wires; place saucepan on damp towel, on counter. Fill bottom third of saucepan with water: this is your ‘extra hand.’ On top of saucepan, place another towel, then a stainless steel mixing bowl. That will hold your bowl in place, so you you can whisk with one hand, and pour oil and liquids with the other. Make sense? Place yolk, mustard, a tsp of lemon juice in bowl, and whisk. Plan on whisking for the next 10 minutes.

Add a few measly drops of oil and whisk. This is your critical moment, when the emulsion comes together, where you are convincing the mayonnaise to be mayonnaise. Add a few more drops and whisk. Once it looks like it is going to come together and seems to develop a little loft, you may pour oil in a slow thin stream. WHISKING all the while. While whisking your arm will get tired; but notice if the mayonnaise seems to feel thick—harder to whisk. THIS is when you want to toss in a tsp of lemon juice here, a tsp of water there. Keep the oil coming, adding the lemon juice or water as needed, whenever the mayo gives you resistance.

Now this is key: don’t whisk the bowl into the mayonnaise. You are whisking fast this whole time, super fast, but not hard. If you whisk hard you will scrape the bottom of the bowl too hard and by golly, your mayonnaise will turn gray. Gray mayonnaise is not appealing. You want white, bright, slightly lemony mayonnaise. So whisk fast, not hard. The final note is this: when it is done, it is done. You will have 7-8 ounces of oil whisked in, it looks great, then stop. You can over mix and kill the poor thing. Leave it. Besides, your arm is probably killing you. You DO need to perfect it, though, and bring it to its’ height: add coarse salt and white pepper to taste. Now taste it, and decide if it needs more salt or pepper, more lemon juice—or a dash of Tabasco.

Your fries never had it so good.

  • del.icio.us
  • Digg
  • StumbleUpon

It is here! The week of Thanksgiving, where you stock your fridge and pantry and start making food. I just made this Brandied Cranberry Sauce, brimming with notes of orange (recipe follows). It keeps for days in the fridge.

If you haven’t figured out your whole menu, or are looking for last minute inspiration or simply some table-top adjustments, perhaps browsing my list of recipes will prove useful (click on dish to find recipe, or in some cases recipes follow).

It does seem Thanksgiving always sneaks up on me. I am busy, busy, then BOOM my son’s birthday which, as you may have guessed, eclipses any holiday that may follow. But in the midst of full and busy lives, there is something nice about having everyone bring their usual, comforting and ‘it wouldn’t be Thanksgiving without it’ food. This year, I am bringing the usual:

Orange Rolls
Brussel Sprouts
Green Bean Casserole

And the new:

Pear Fennel Soup
Brandied Cranberry Sauce (recipe follows)
Red Pepper Jelly & Goat Cheese Appetizer
Velvet Pear Cocktail
Orange Ginger Rum Cocktail (recipe follows)

And thank goodness my sister is bringing:

Pecan Crusted Sweet Potatoes

Recipes:

Brandied Cranberry Sauce
1 bag of fresh cranberries (12 oz)
1/3 cup brandy
2 full T orange marmalade
1 1/4 cup sugar
Optional add-ins: 1 T orange zest, 1 T Grand Marnier

Mix to combine, place in 8 inch square pan. Bake in 350 oven, uncovered, for 30 minutes. Can make up to week in advance, and store in fridge (truth be told, I made a batch and froze it in advance).

Orange Ginger Rum
1 small glugg ginger simple syrup (recipe follows)
1 medium glugg fresh orange juice (squeezed or otherwise)
1 small glugg triple sec
1 large glugg light rum
1 medium glugg soda

(I tried to measure, really. But try the gluggs and see what you come up with; perhaps you will measure and send me the recipe?). I use CRUZAN light rum. Pour all ingredients into one glass. Fill second glass with ice, pour contents of first glass into ice-filled second glass. Voila!

Ginger Simple Syrup
2/3 cup sugar
1 cup water
1 1/2 inch of ginger, peeled and sliced thin

Place water and sugar over medium heat, stir a few times. In about 5 minutes the sugar should be melted. You never want a boil, but hints of a simmer are fine. As soon as the sugar is melted, plop in all the ginger. Let simmer (or just under a simmer, you don’t want to overcook the sugar, it shouldn’t be amber in color). Off heat and let ginger steep for another 10-15 minutes. Strain out ginger and use syrup!

Happy Thanksgiving everyone! May it be brimming with food, friends, family, and reasons to toast over and again.

  • del.icio.us
  • Digg
  • StumbleUpon